Colouring in drawings is a personal pet peeve of mine. I’ve never been a fan of being patient with my colouring pencils. I prefer to use whatever colours I have lying around to slap some life onto my drawings only so I can shade everything into proportion with my black pen.
Nonetheless, I follow a small routine that makes my colouring and shading method quick and efficient.
Below are my simple tips on colouring in a drawing you’ve completed the line art for.
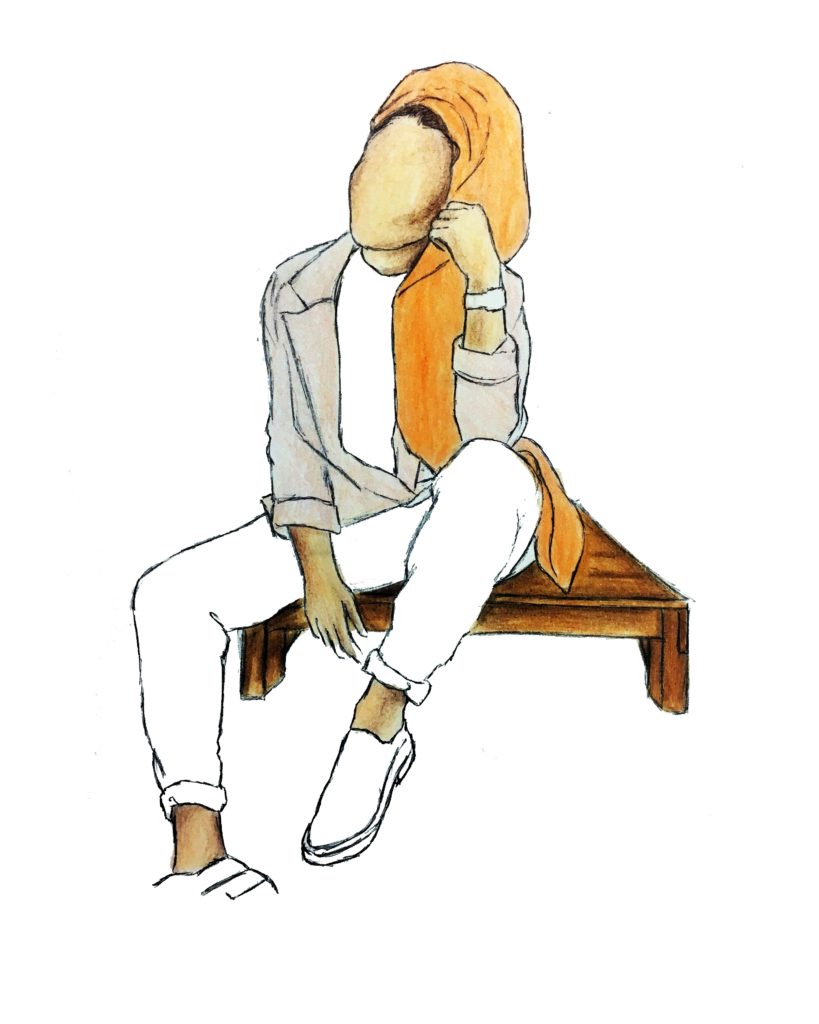
1. It’s always a good idea to start with a reference picture that has a simple colour palette. This helps you understand appreciate different tones and shades of the same colour as well as keeping it easy for you.
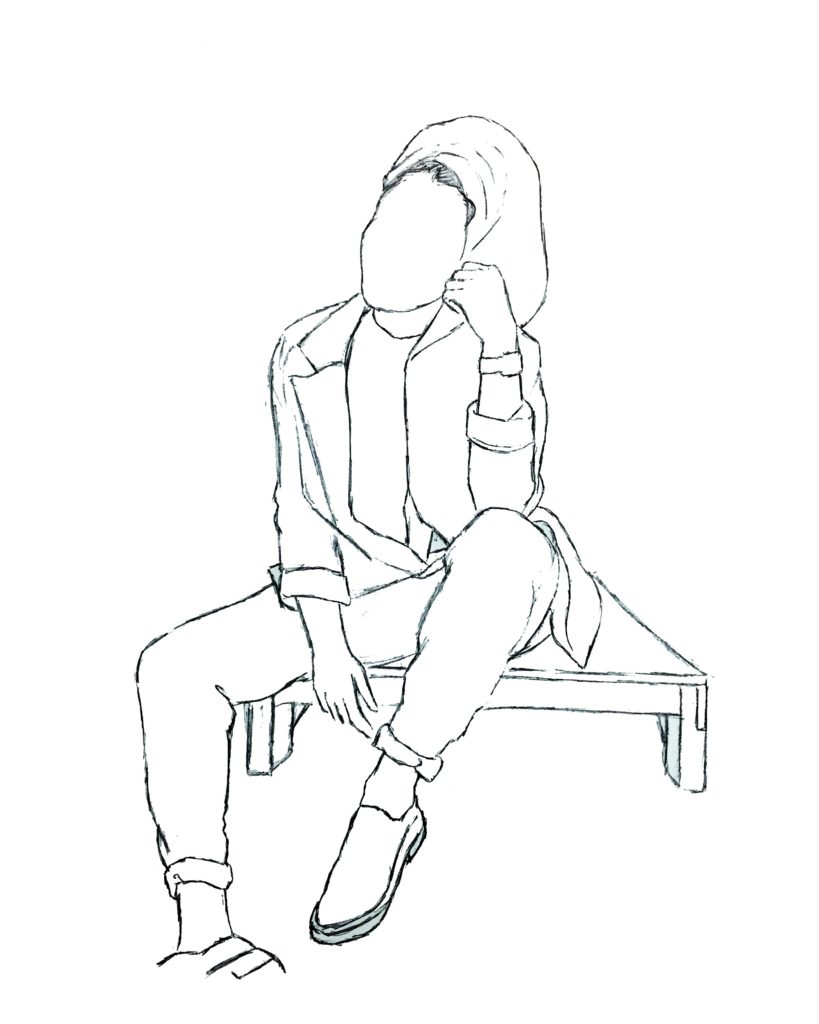
Begin with clean line art that’s been drawn in pen (draw in pencil beforehand obviously and then rub out the lines once you have gone over them in pen). This will help you not to worry about smudging pencil marks as well allowing you focus on colouring only.
2. Remember, by no means feel like you must splash out on ‘artist’ colouring pencils. Standard pencils that you can purchase from your nearest supermarket or stationary shop will do if you know how to use them properly.
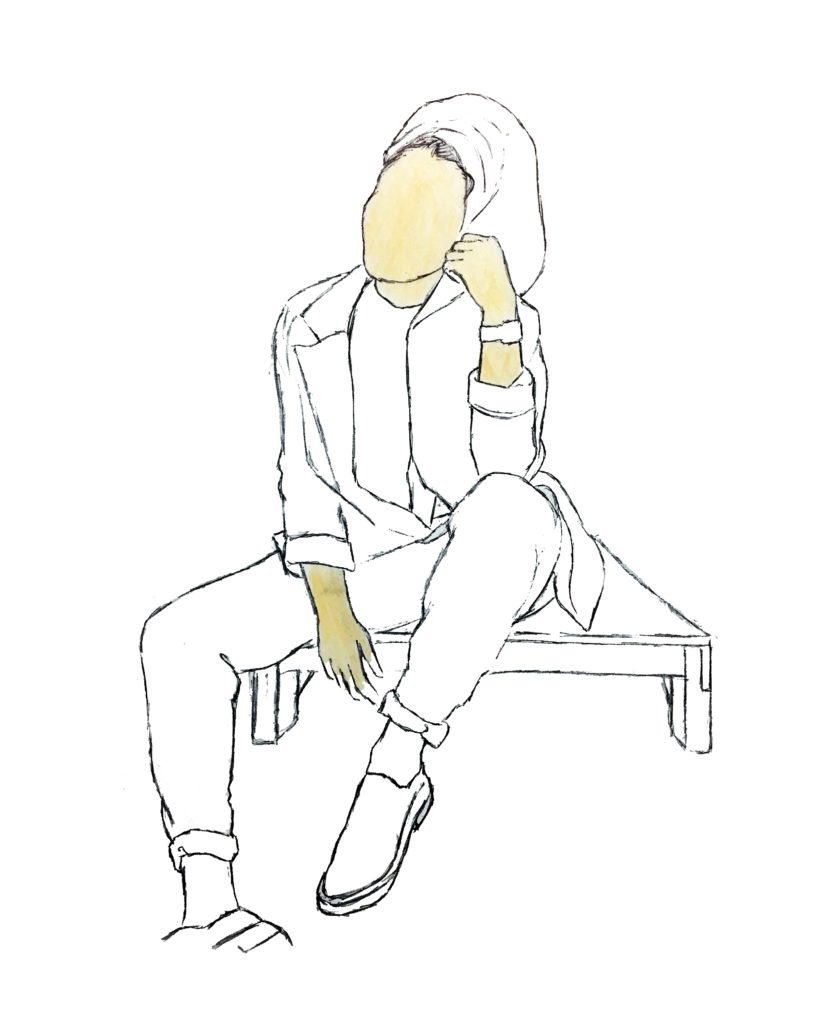
First, start out my evenly colouring in everywhere the skin is visible. Cheaper colouring pencils are particularly good for this as more expensive pencils sometimes gives a very grainy effect when used. Cheap pencils form a better ‘base’ or ‘foundation’ for the skin texture.
3. Next, use a different set of pencils that have a big more pigmentation in them in a tone darker to warm up the colour of the skin. Continue to colour in circular motions while making sure to press down firmly to get an even coverage. If you’re particularly fond of doing your own makeup, this whole process is very similar.
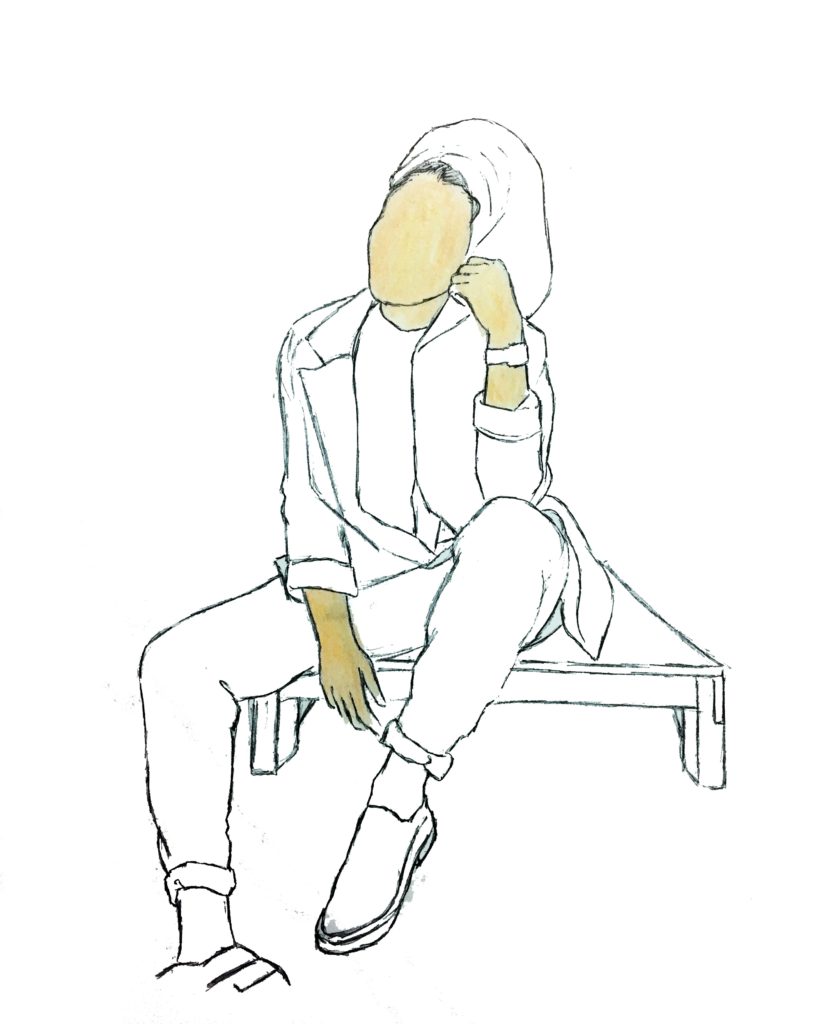
4. Now using a colour significantly darker to the ones you’ve used to layer the bases of the skin, usually a dark brown, shade in parts of the face and body where a shadow is present. Common areas for this are the cheekbones, around the forehead, the area under the chin, collarbones, undersides of arms and fingers. Make sure to not draw on harsh lines and blend in all the tones together to correctly give the illusion of structure and shadows.
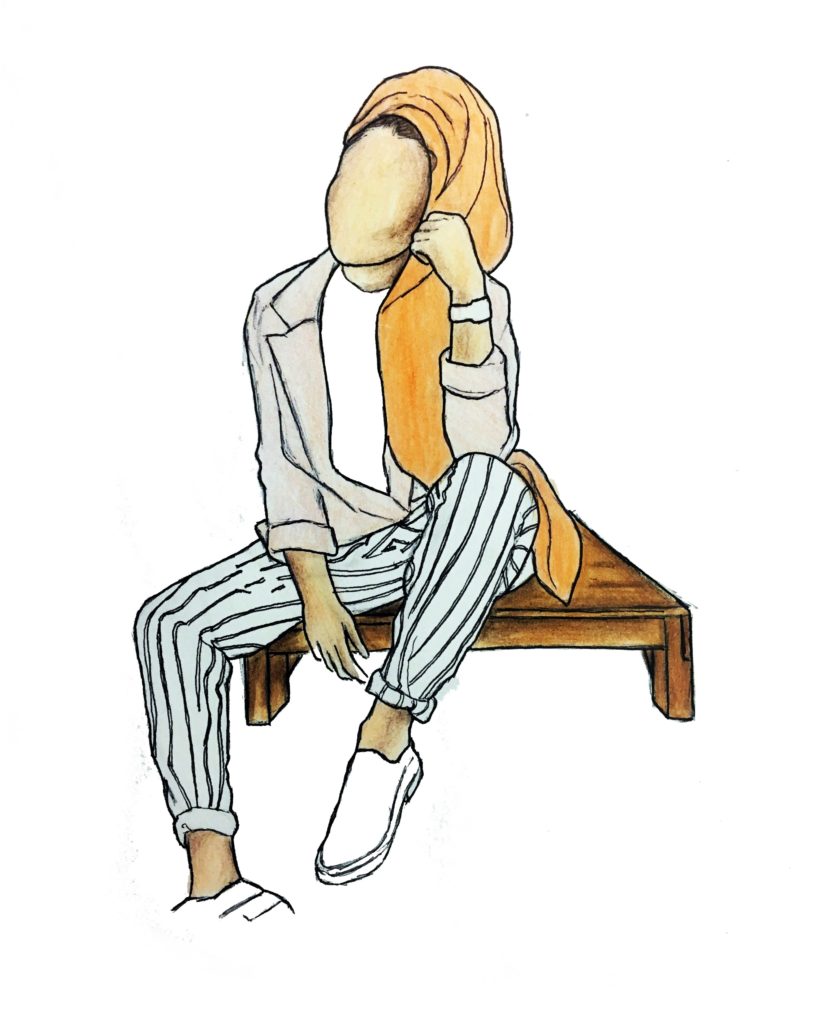
5. Once you have completed your colouring in of the skin, move onto doing the same with the clothes. Feel free to play around a little and experiment with your colours to get a feel for what colours contrast or complement each other.
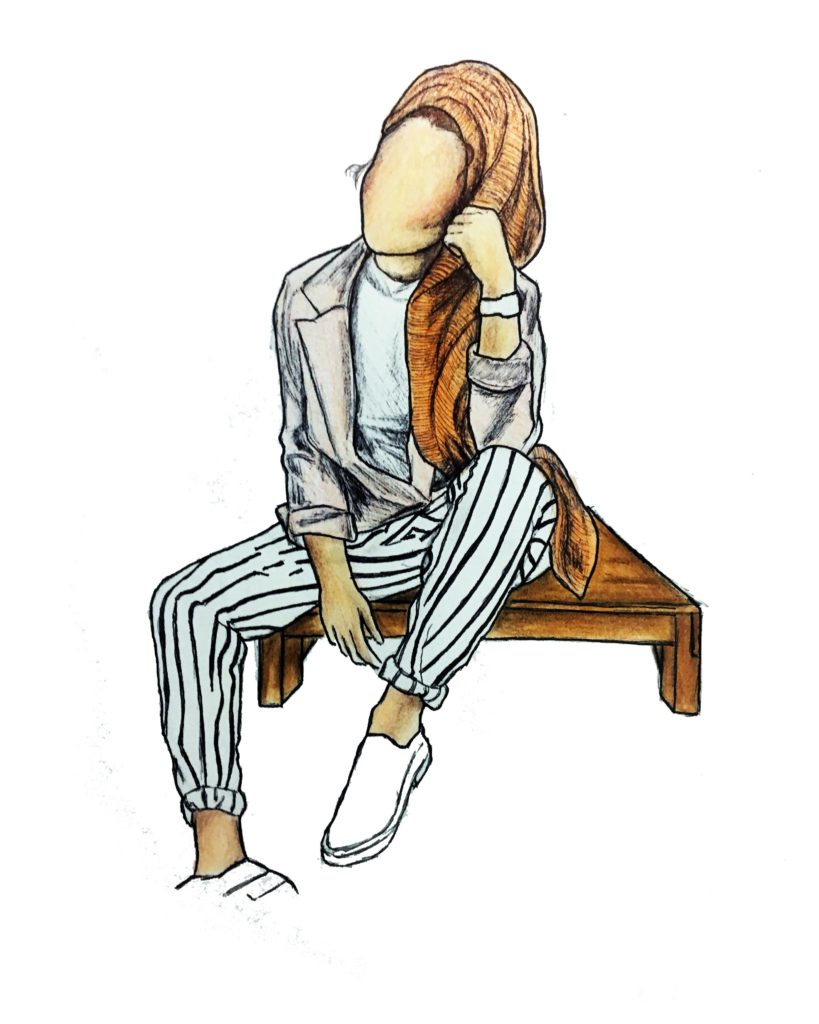
6. Using a slightly thick black pen, go over all the lines to bulk up the drawing. This gives a sense of boldness and it also ties in your drawing together and shows you part of the finished product. Use this opportunity to also draw on any small regions that require thicker black outlines. This is often the case with clothes patterns. (The stripes in this drawing, for example.)
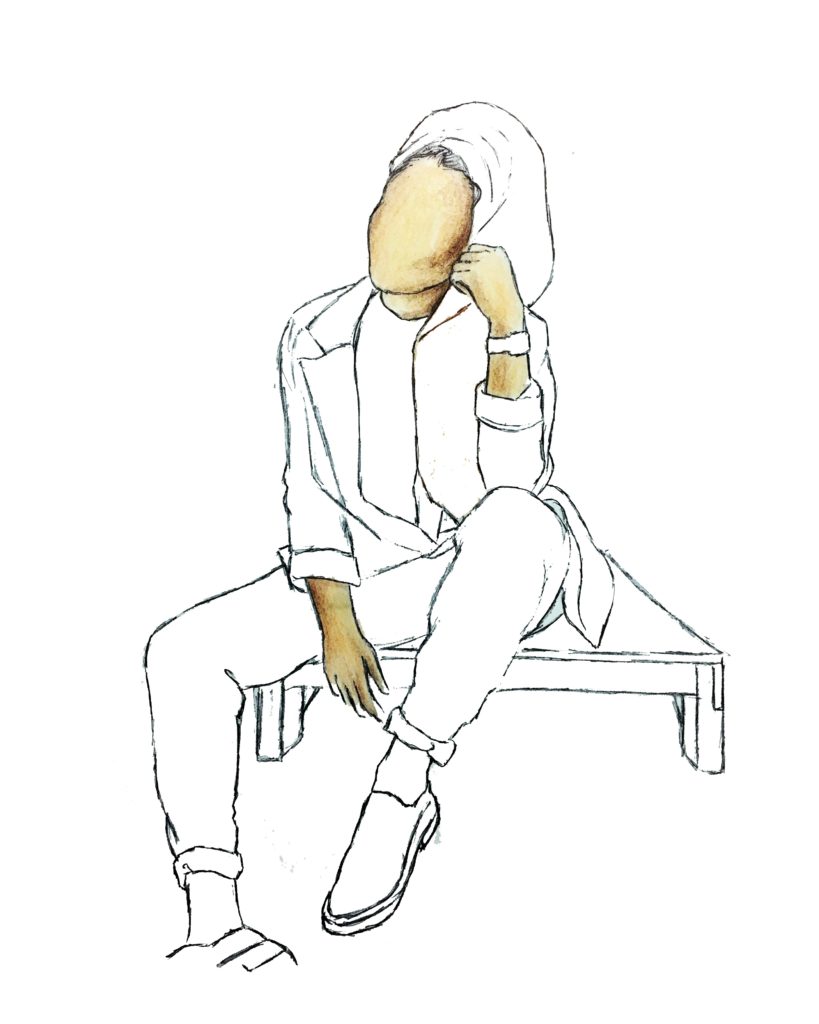
7. Finally, using your pen, lightly go over areas you previously shaded in with your colouring pencils as well trying to re-create any other shadows from your reference picture. The key to effective shading is knowing when to press down harder on your pen and when not to, to allow for thicker or thinner/finer lines respectively.
As a final touch, scan your drawing and upload it onto your computer/laptop where you can clean up any messy background lines. You can even add a background and restore the correct intensities of the colours you’ve been working with.